Christmas is the perfect time to give your nails a little extra sparkle. You might love classic red polish, tiny snowflakes, shiny chrome, or cute Christmas tree art. But choosing a design that matches your style can feel harder than it should. You don’t need long acrylics or complicated salon art to enjoy festive nails. Short natural nails can look beautiful, too.
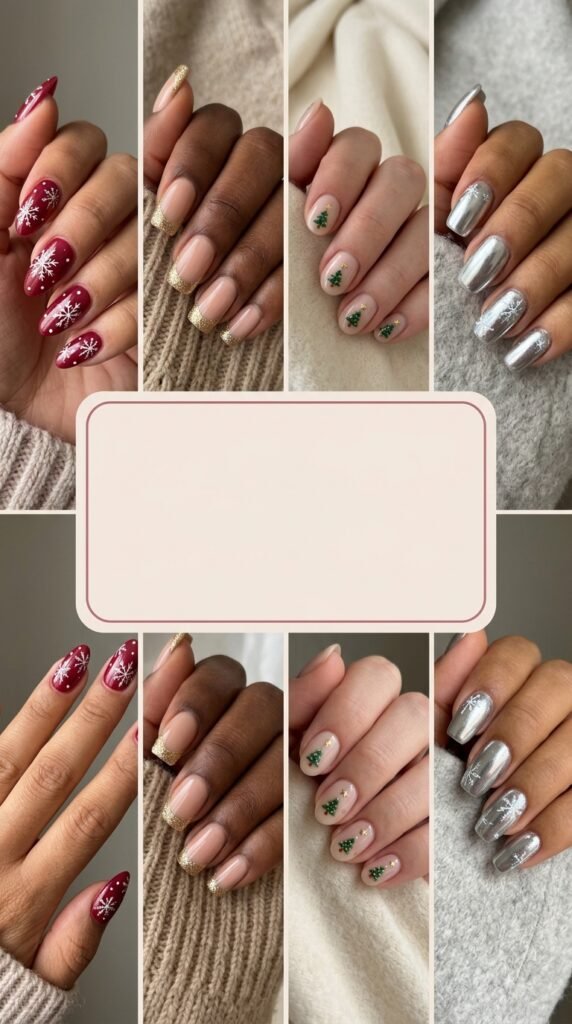
These Christmas nail ideas include classic colors, simple DIY designs, glossy finishes, and detailed holiday art. You’ll find options for different nail shapes, lengths, and skill levels. From elegant gold French tips to playful candy cane stripes, there’s a design for your next holiday gathering. Keep scrolling to find your favorite festive manicure.
What Actually Makes Christmas Nail Designs Work?
Great Christmas nails start with three things: clean nail prep, colors that work together, and a finish you love. Red, green, white, gold, and silver create a familiar holiday palette. You can use all five or keep things simple with two shades. Your nail shape also matters. Short squoval nails suit everyday designs, while almond and oval shapes offer more space for details. Apply thin polish layers and let each one dry before adding art. Finish with a compatible top coat to protect your design and boost shine. You don’t need perfect freehand skills. Stickers, dotting tools, and fine nail brushes can help you create detailed looks at home.
1. Classic Red Christmas Nails
You want a timeless Christmas manicure that looks polished with little effort.
The Formula:
- Cherry-red or deep cranberry nail polish
- Short oval or medium almond nails
- Two thin coats of color
- High-gloss gel-effect top coat
- Cuticle oil for a neat finish
Why It Works: Classic red feels festive without needing extra decorations. It suits many nail lengths and works for casual gatherings or dressy celebrations. A glossy finish makes the color look rich and smooth.
Pro Tip: Apply polish in thin layers. Thick coats can create bubbles and take longer to dry.
Best For: Beginners, short or medium nails, and Christmas dinners.
Make It Last: Seal the free edge with top coat and reapply it as directed.

You must try these 10 Mushroom Bronde Hair Color Ideas for Every Skin Tone
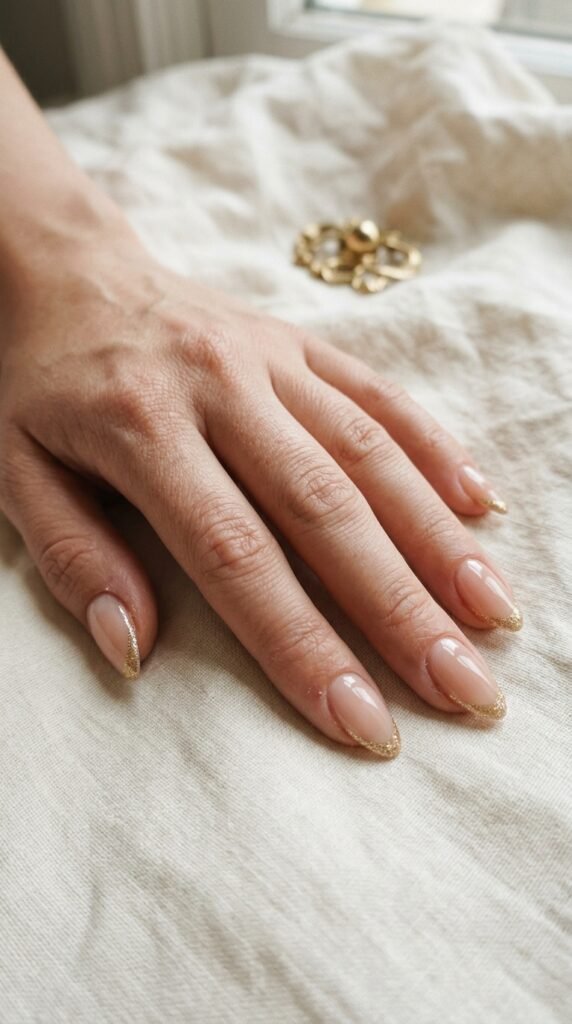
2. Gold Glitter French Tips
You love a little sparkle but prefer a clean, elegant manicure.
The Formula:
- Sheer nude or milky pink base
- Gold glitter polish for the tips
- Short square or almond nail shape
- Thin nail art brush or French tip guide
- Clear glossy top coat
Why It Works: Gold tips add holiday sparkle without covering the entire nail. The sheer base keeps the design light, while the glitter catches the light at parties and dinners. You can adjust the glitter coverage to suit your taste.
Pro Tip: Place the densest glitter near the nail tip. Use a fine brush to soften the edge toward the center.
Best For: Beginners, short-to-medium nails, and elegant Christmas events.
Make It Last: Keep the glitter layer thin and seal the tips carefully.
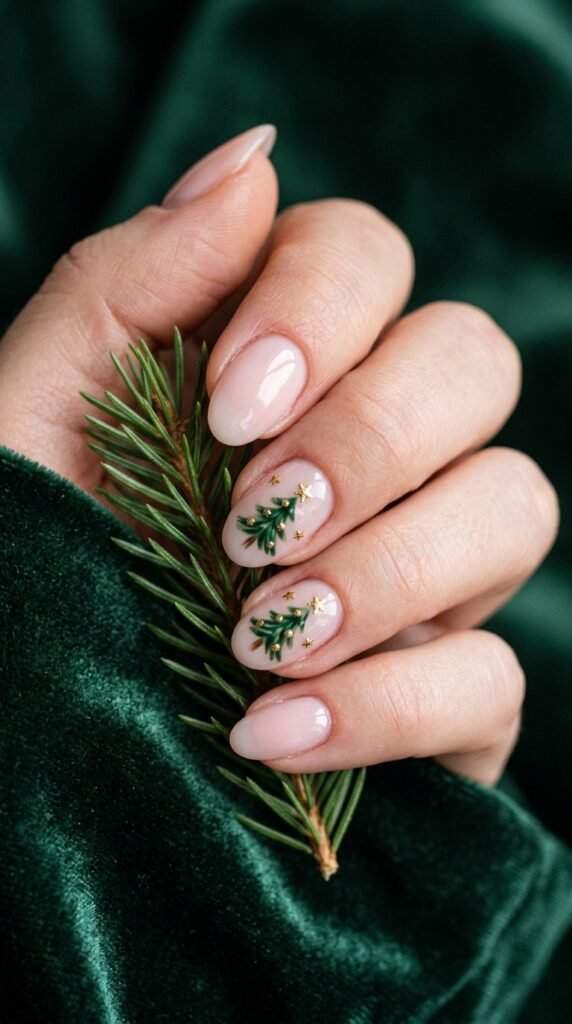
3. Tiny Christmas Tree Nail Art
You want a playful holiday design that feels cute rather than busy.
The Formula:
- Sheer pink or milky white base
- Forest-green polish
- Fine nail art brush or striping brush
- Gold star detail or tiny gold dot
- Glossy top coat
Why It Works: A small Christmas tree creates a clear seasonal theme. Keeping the artwork on one or two accent nails leaves the rest of the manicure simple. Green and gold also pair beautifully with a neutral base.
Pro Tip: Build the tree from three small zigzag lines instead of drawing one complicated shape.
Best For: DIY nail artists, oval or almond nails, and holiday parties.
Make It Last: Let the artwork dry fully before applying top coat with gentle strokes.
💡 Quick Pro Tip
Start with clean, dry nails and gently push back your cuticles. Avoid cutting living cuticle tissue. Use a base coat, thin color layers, and a compatible top coat for a smoother finish.
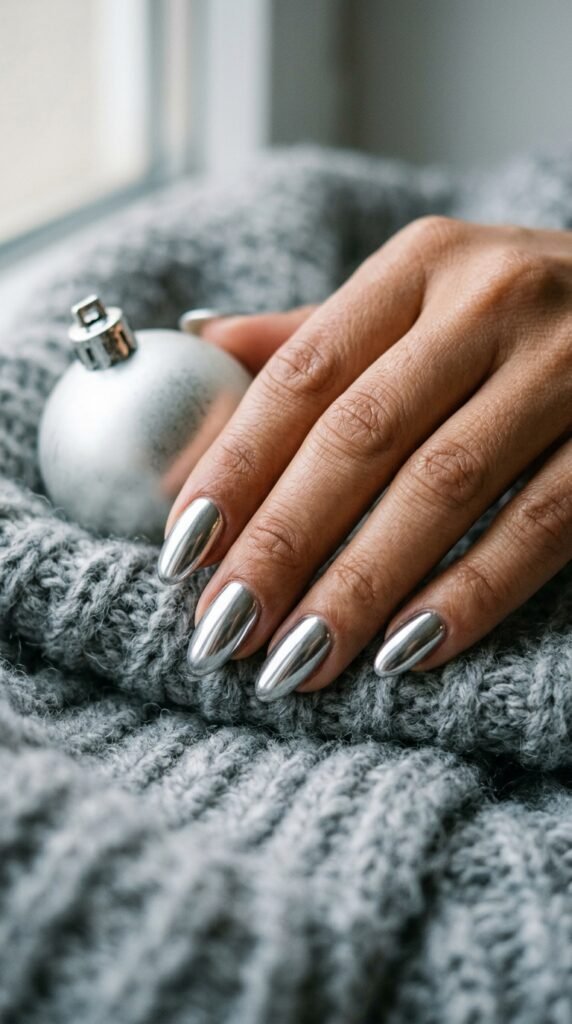
4. Silver Chrome Christmas Nails
You want a modern manicure that shines under Christmas lights.
The Formula:
- Silver chrome powder or chrome-effect polish
- Smooth, properly prepared nail surface
- Compatible base and top coat
- Oval or almond nail shape
- Small applicator for chrome powder, if needed
Why It Works: Silver chrome creates a reflective, mirror-like finish. It feels festive without relying on traditional red and green. A full chrome manicure also keeps the design simple because the finish does most of the work.
Pro Tip: Chrome powder systems need compatible products and specific curing steps. Follow the product instructions rather than mixing random formulas.
Best For: Medium nails, metallic-style lovers, and evening celebrations.
Make It Last: Seal the edges and follow the manufacturer’s curing directions.
You must try these 10 Pretty Ombre Prom Dresses for a Dreamy Night
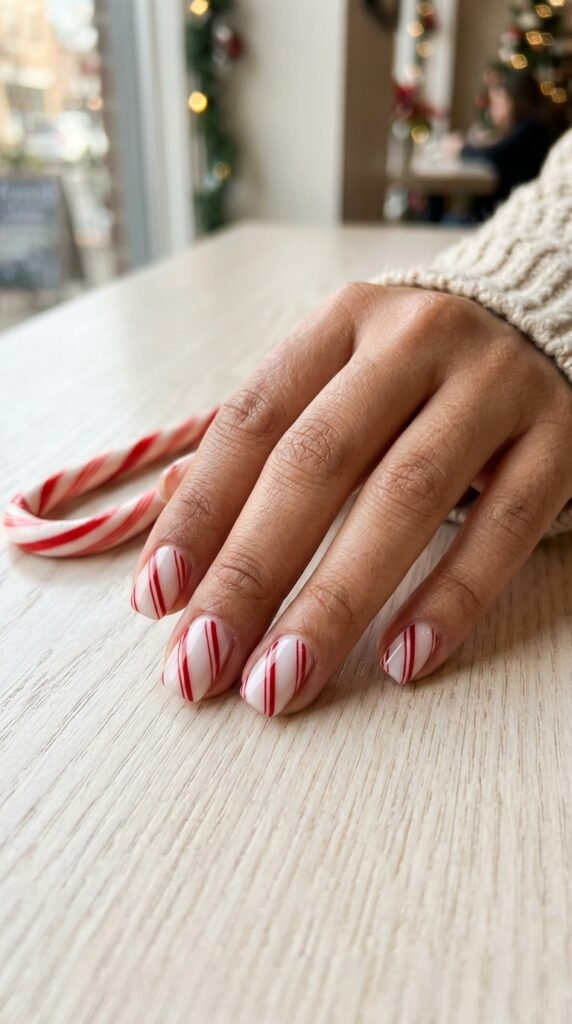
5. Candy Cane Stripe Nails
You want a cheerful Christmas manicure inspired by holiday treats.
The Formula:
- White or milky pink base
- Bright red nail art polish
- Fine striping brush
- Optional sheer nude accent nail
- Glossy top coat
Why It Works: Red and white stripes instantly suggest candy canes. You can paint stripes on every nail or use one accent nail for a quieter look. The design works with short nails when you keep the lines narrow.
Pro Tip: Draw the stripes slowly from one side of the nail to the other. Let each line dry before adding the next.
Best For: Beginners practicing nail art, short or medium nails, and family celebrations.
Make It Last: Avoid thick stripes that take too long to dry beneath the top coat.
⚠️ Common Mistake
Adding too many decorations can make small nail designs look crowded. Choose one main detail, such as glitter, a tree, or stripes. Keep the remaining nails simple so the design stays clear and balanced.
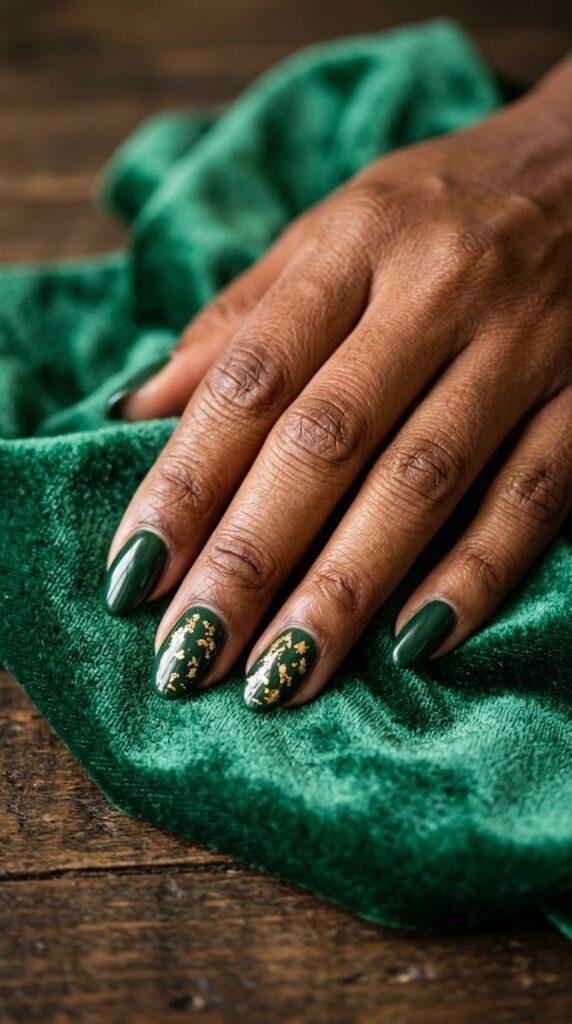
6. Deep Green and Gold Holiday Nails
You prefer rich colors and a manicure with a little luxury.
The Formula:
- Deep forest-green polish
- Gold foil flakes or fine gold details
- Oval or short almond shape
- Fine detail brush or foil tool
- Glossy top coat
Why It Works: Forest green gives the manicure depth, while gold creates a warm contrast. You can use gold foil on one accent nail or add a fine line to each nail. The design feels festive without needing large decorations.
Pro Tip: Use tiny foil pieces instead of large flakes. Small details are easier to control on short nails.
Best For: Medium nails, intermediate DIY artists, and Christmas dinner.
Make It Last: Press foil gently into the suitable tacky layer or product specified by its instructions, then seal it well.
7. Milky White Snowflake Nails
You want a soft winter manicure with delicate seasonal details.
The Formula:
- Milky white or translucent pink base
- White nail art polish
- Fine detail brush or nail art pen
- Short oval or medium almond shape
- Glossy or subtle shimmer top coat
Why It Works: A sheer base keeps the manicure soft, while white snowflakes add winter charm. You can use one snowflake per accent nail or add tiny dots around the design. The look suits both casual days and festive evenings.
Pro Tip: Draw a small cross first, then add short diagonal branches to create a snowflake.
Best For: Beginners with patience, short-to-medium nails, and winter gatherings.
Make It Last: Use a light hand when applying top coat to avoid smearing fine details.

Try these How to Style 10 Sweaters for Cold Winter Days
Your holiday manicure can be simple, bold, playful, or elegant. Choose the design that feels like you.
8. Red and Gold Glitter Accent Nails
You want festive sparkle without wearing glitter on every nail.
The Formula:
- Deep red or burgundy polish
- Gold glitter polish
- One or two accent nails
- Fine glitter brush or sponge applicator
- Glossy top coat
Why It Works: Red and gold create a classic Christmas color combination. Accent nails give you sparkle while keeping the rest of the manicure easy to wear. You can choose fine glitter for a soft shimmer or larger glitter pieces for extra shine.
Pro Tip: A small sponge can help build glitter coverage on one accent nail. Protect the skin around the nail, and remove excess glitter before sealing.
Best For: Beginners, short or long nails, and festive parties.
Make It Last: Use thin layers and allow each layer to dry fully.

9. Minimal Christmas Dot Nails
You like festive nail art but don’t want detailed pictures on your nails.
The Formula:
- Nude, cream, or pale pink base
- Red, green, and gold nail art polish
- Dotting tool or the rounded end of a small tool
- Short squoval or round nails
- Clear glossy top coat
Why It Works: Tiny dots create a simple ornament-inspired design. You can arrange them like a small tree, a garland, or scattered festive lights. This design also works well on short natural nails.
Pro Tip: Test the dotting tool on paper first. Wipe away excess polish before touching your nail.
Best For: Beginners, short nails, and anyone who prefers understated Christmas nail art.
Make It Last: Keep the dots small and let them dry before applying top coat.

🧴 Shortcut
No nail art kit? Use a toothpick to make tiny dots, a striping brush for simple lines, and a glitter polish for quick sparkle. Start with one accent nail. It can give your manicure a festive look without a complicated design.
10. Christmas Cat-Eye Nails
You want a glowing manicure with depth and a little magic.
The Formula:
- Red, emerald, or deep-plum magnetic gel polish
- Compatible magnetic-gel base and top coat
- Nail art magnet
- Short almond or medium oval shape
- Suitable lamp if the product requires curing
Why It Works: Magnetic cat-eye polish creates a shifting band of light across the nail. Deep red and emerald feel festive, while plum offers a less traditional choice. The effect adds detail without painting separate holiday symbols.
Pro Tip: Hold the magnet at the angle recommended by the product instructions. The light pattern can change with distance and direction.
Best For: Intermediate users, medium nails, and evening holiday events.
Make It Last: Follow the gel system’s curing instructions. Never peel or pick off gel polish.

You must try these 10 Easy Christmas Hairstyles for Every Woman
Frequently Asked Questions
What are the most popular Christmas nail colors?
Classic Christmas nail colors include red, forest green, white, gold, and silver. Burgundy and emerald offer deeper options, while milky pink and cream create a softer look. You can combine two colors or choose one shade with a glossy finish for a simple festive manicure.
Can I do Christmas nails on short natural nails?
Absolutely. Short nails work well with red polish, gold French tips, tiny dots, small snowflakes, and simple candy cane stripes. Keep the art small and use thin coats. A neat shape, clean nail prep, and glossy top coat can make even a basic manicure feel special.
How do I make Christmas nail polish last longer?
Start with clean, dry nails and apply a suitable base coat. Add thin polish layers and let them dry according to the product instructions. Seal the free edge with top coat. Wear gloves for cleaning, and use cuticle oil to keep the surrounding skin comfortable.
How can beginners create Christmas nail art at home?
Choose an easy design, such as dots, glitter tips, or one accent nail. Use a dotting tool or fine brush, and practice the pattern on paper first. Work slowly and let each layer dry. Nail stickers can also help if freehand painting feels difficult.
Are gel Christmas nails better than regular polish?
Neither option suits everyone. Regular polish is easy to remove at home, while gel polish often offers a longer-wearing finish when applied and cured correctly. Gel requires careful removal and proper product use. Choose the method that fits your budget, skill level, and nail-care preferences.
Find Your Favorite Christmas Nail Design
The best Christmas nail ideas are the ones you enjoy wearing. You might choose glossy red nails, tiny snowflakes, gold French tips, or shimmering chrome. There is no rule that says holiday nails need to be long or covered in glitter. Start with your favorite color and pick one detail that makes it feel festive. If you’re doing your nails at home, keep the first design simple. You can always try a more detailed look next time. Save this guide before your next manicure appointment or DIY nail session. Which Christmas nail design would you try first?