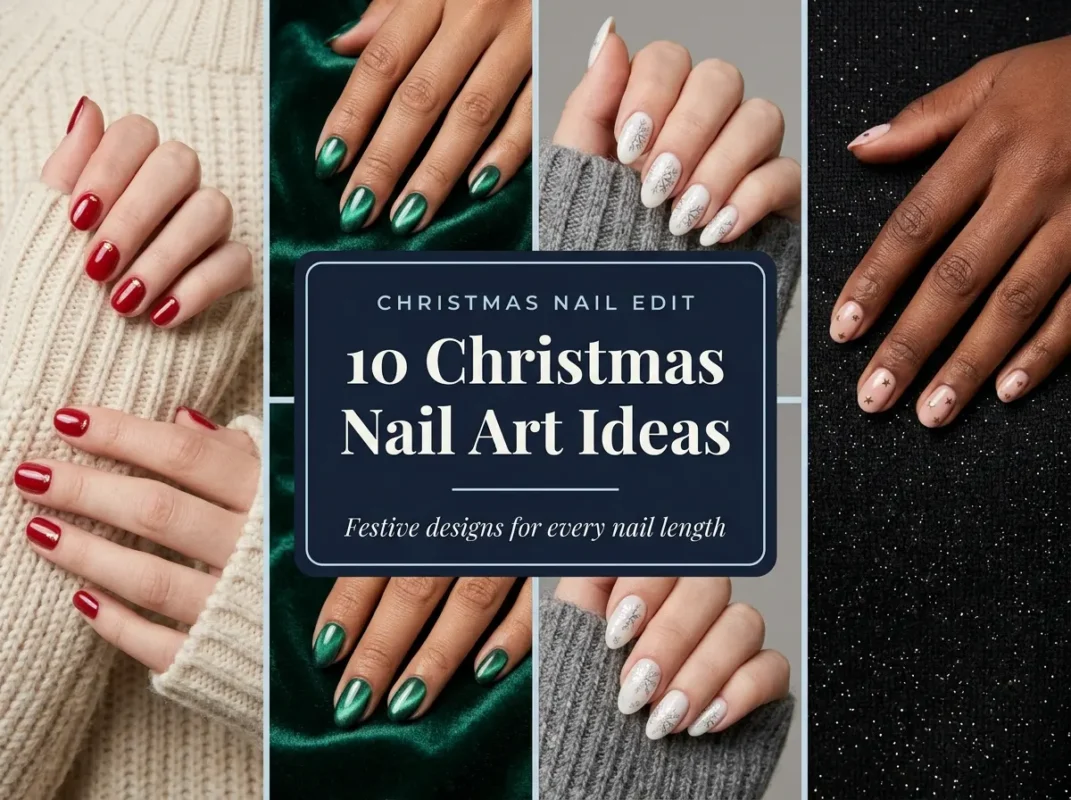
Scope: Christmas nail art for women who want festive designs in classic holiday colors, modern finishes, and options for short natural nails or longer salon sets. You want your nails to look festive for Christmas, but choosing one design can feel surprisingly difficult. Red glitter looks gorgeous, tiny snowflakes look adorable, and those little Christmas trees are hard to resist. The good news? Christmas nail art doesn’t have to mean long nails or complicated designs. You can create a beautiful holiday manicure with simple polish, a few nail art tools, or a salon appointment. The trick is choosing a design that fits your nail length, personal style, and holiday plans. In this guide, you’ll find 10 Christmas nail art ideas, from classic red manicures to delicate snowflakes, sparkling chrome, and playful candy cane details. Each idea includes practical styling tips, maintenance advice, and inspiration for your next manicure. Your Christmas nails can be simple, sparkly, elegant, or playful. Let’s find the design you’ll love wearing throughout the holiday season.
In this article18 sections
What Actually Makes Christmas Nail Art Work?
Beautiful Christmas nail art starts with three things: good nail preparation, balanced colors, and a suitable finish. First, shape your nails before applying polish. Short, rounded nails work beautifully with tiny details, while almond and square shapes offer more space for artwork. Next, choose a clear color story. Red, green, white, gold, and silver create a traditional Christmas palette. Milky pink, champagne, and icy blue offer a softer holiday look. Finally, prepare your nails carefully. Remove old polish, clean the nail plate, and apply a suitable base coat. Finish with a compatible top coat to protect your design and add shine.You don’t need ten complicated designs on ten fingers. One or two detailed accent nails can make your entire manicure feel special.
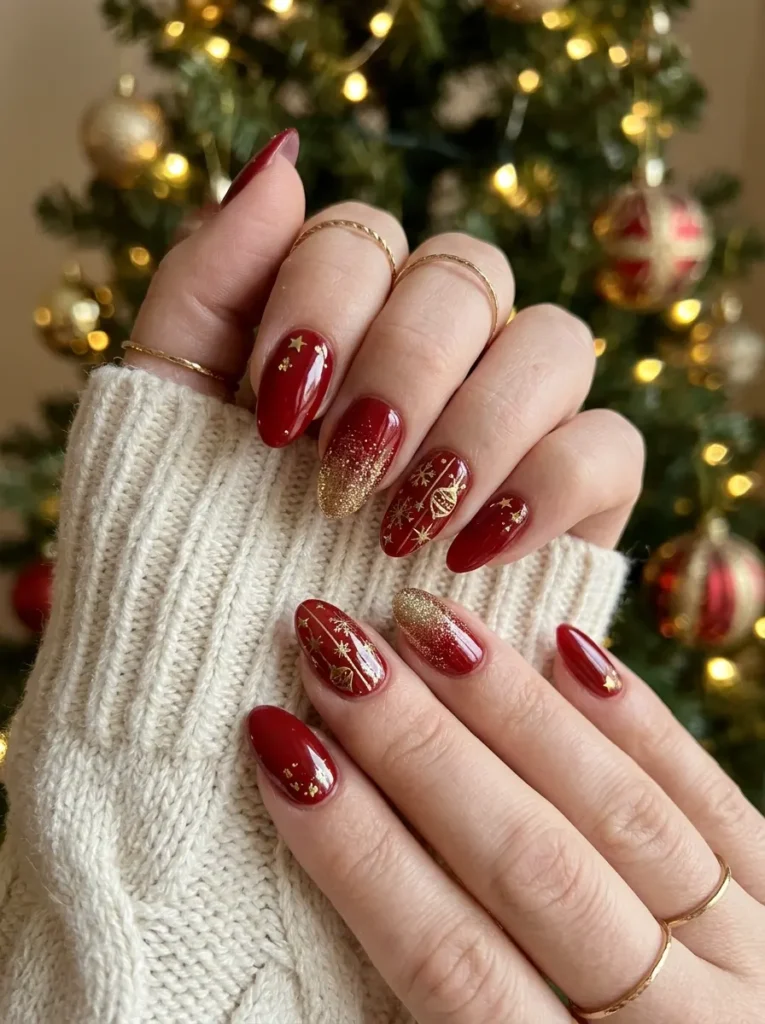
1. Classic Red Christmas Nails With Gold Accents
You want a festive manicure that looks beautiful at family dinners and holiday parties.
The Formula:
- Base color: rich cherry red or deep cranberry.
- Design: two solid red nails with delicate gold accents on the others.
- Technique: use a fine nail art brush for tiny gold lines or dots.
- Finish: glossy gel top coat or regular polish top coat.
- Tools: red polish, gold nail art polish, base coat, and a fine liner brush.
Why It Works: Red instantly brings Christmas to mind. Gold adds warmth without making the design look too busy. The simple color combination also works across different nail lengths.
Pro Tip: Apply gold details after the red polish dries. Keep each accent small so the red remains the main attraction.
Best For: Short square, rounded, almond, and medium-length nails. This design suits Christmas dinners, office celebrations, and holiday parties.
Make It Last: Seal the tips with top coat. Reapply regular polish top coat every few days if the product instructions allow.
2. Green Christmas Nails With Tiny Christmas Trees
You love traditional Christmas colors but want something more creative than plain green polish.
The Formula:
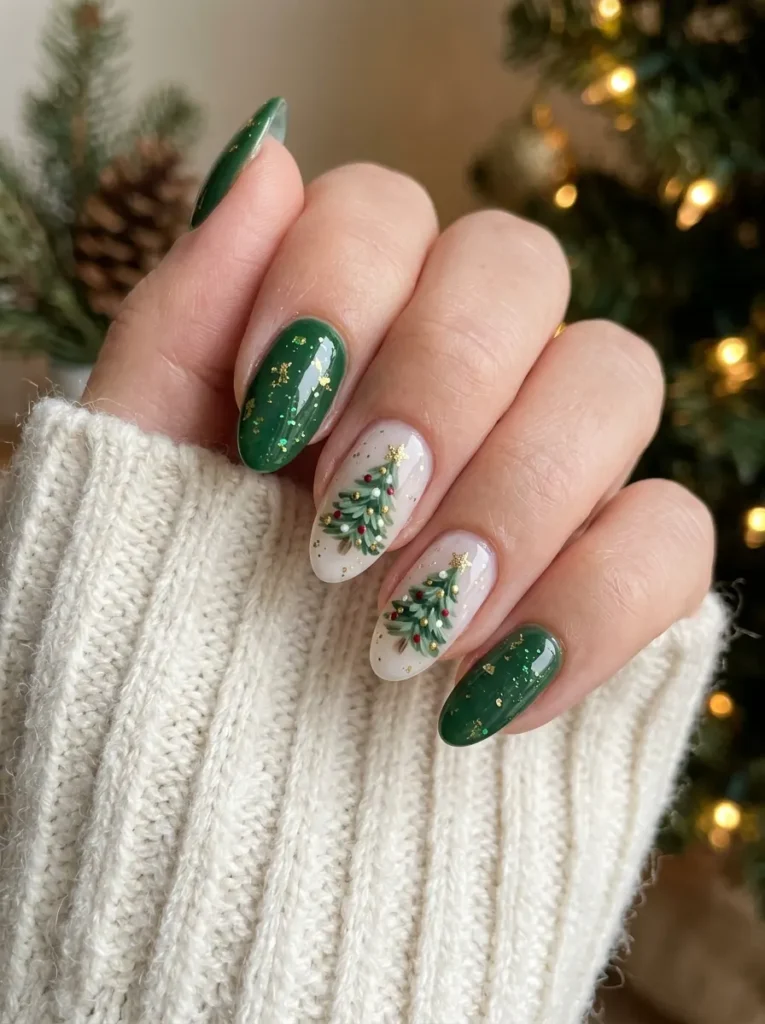
- Base color: forest green, emerald, or deep pine.
- Design: tiny green Christmas trees on a nude or milky-white base.
- Technique: build each tree with small strokes using a detail brush.
- Accent: add a tiny gold dot at the top of each tree.
- Finish: glossy top coat.
Why It Works: Forest green feels rich and seasonal. Tiny trees create a clear Christmas theme without covering every nail with artwork.
The contrast between the neutral base and green designs keeps the manicure visually balanced.
Pro Tip: Try one tree on each ring finger first. Small designs look cleaner when you leave enough empty space around them.
Best For: Short natural nails, oval nails, and medium almond shapes. Beginners can use a dotting tool to build simple triangular trees.
Make It Last: Allow every layer to dry before adding the next. Apply top coat gently to avoid dragging the artwork.
3. Candy Cane Christmas Nails With Red and White Stripes
You want playful Christmas nails that look cheerful without requiring a full salon art set.
The Formula:
- Base color: crisp white or sheer milky pink.
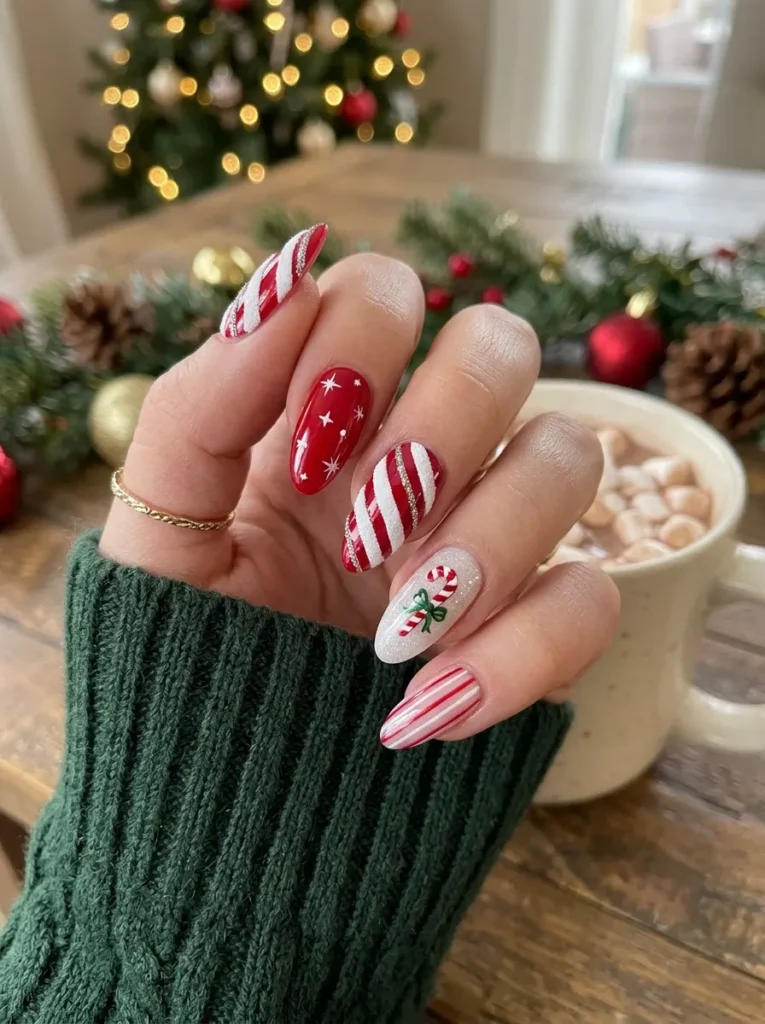
- Design: diagonal red and white candy cane stripes.
- Technique: use striping tape or a fine liner brush.
- Accent: add one candy cane design to each ring finger.
- Finish: glossy top coat.
Why It Works: Candy cane stripes are easy to recognize and bring a playful holiday feel. The red-and-white palette keeps the manicure classic.
You can place the stripes on every nail or keep them on two accent nails. The second option creates a cleaner look and saves time.
Pro Tip: Let the base color dry completely before using striping tape. Remove the tape while the design remains slightly wet, if your polish system allows it.
Best For: Short square nails, oval nails, and longer almond nails. Beginners can start with two accent nails rather than ten.
Make It Last: Use thin coats and seal the striped design with a compatible top coat. Avoid thick polish layers near your cuticles.
💡 Quick Pro Tip: Keep your design simple on shorter nails. A tiny tree, two candy cane stripes, or one gold accent can look more polished than several crowded details. Start with your favorite holiday color, then add one decorative element.
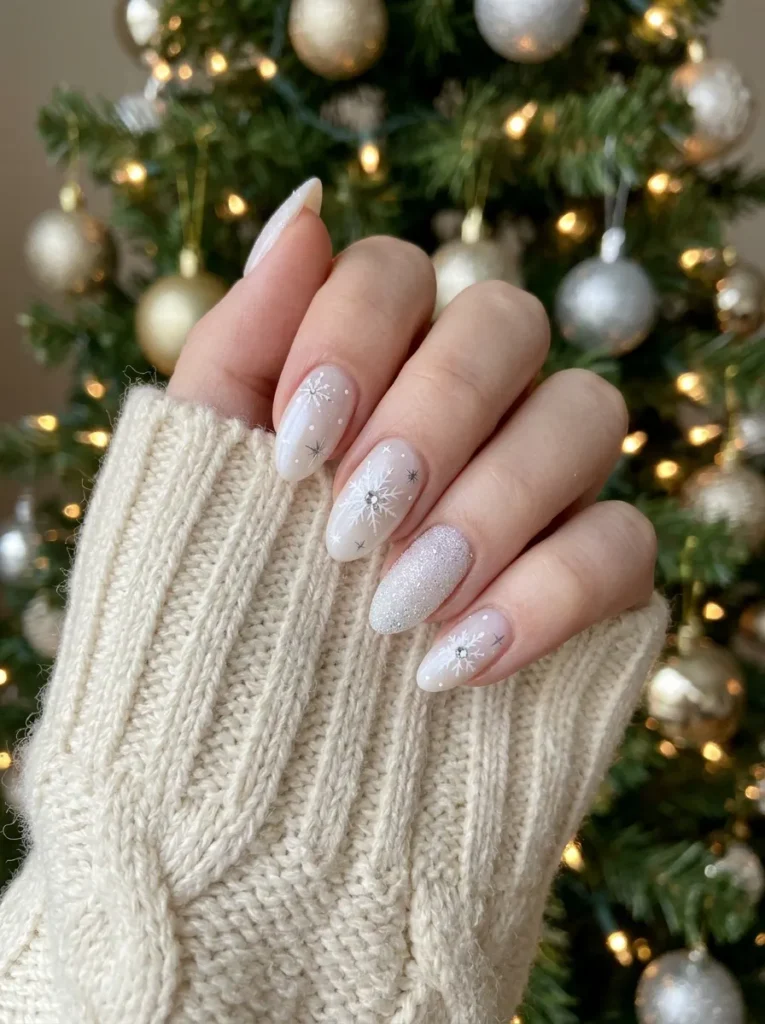
4. White Christmas Nails With Delicate Snowflakes
You love a clean, winter-inspired manicure that feels soft, elegant, and festive.
The Formula:
- Base color: milky white, sheer pink, or pale icy blue.
- Design: delicate white or silver snowflakes.
- Technique: use a fine liner brush or snowflake stamping plate.
- Accent: add a tiny silver dot to the center of each snowflake.
- Finish: glossy top coat or a subtle pearly finish.
Why It Works: Pale colors create a fresh winter look. Snowflakes provide detail without relying on bold holiday colors.
A sheer base also lets your natural nail show through. That makes the design especially pretty on short nails.
Pro Tip: Build each snowflake from a few thin lines. Add tiny branches afterward instead of drawing a complicated shape all at once.
Best For: Short rounded nails, oval nails, and medium almond shapes. This design suits Christmas brunches, winter weddings, and New Year’s celebrations.
Make It Last: Protect the delicate lines with a thin top coat. Avoid repeated filing after you finish the design.
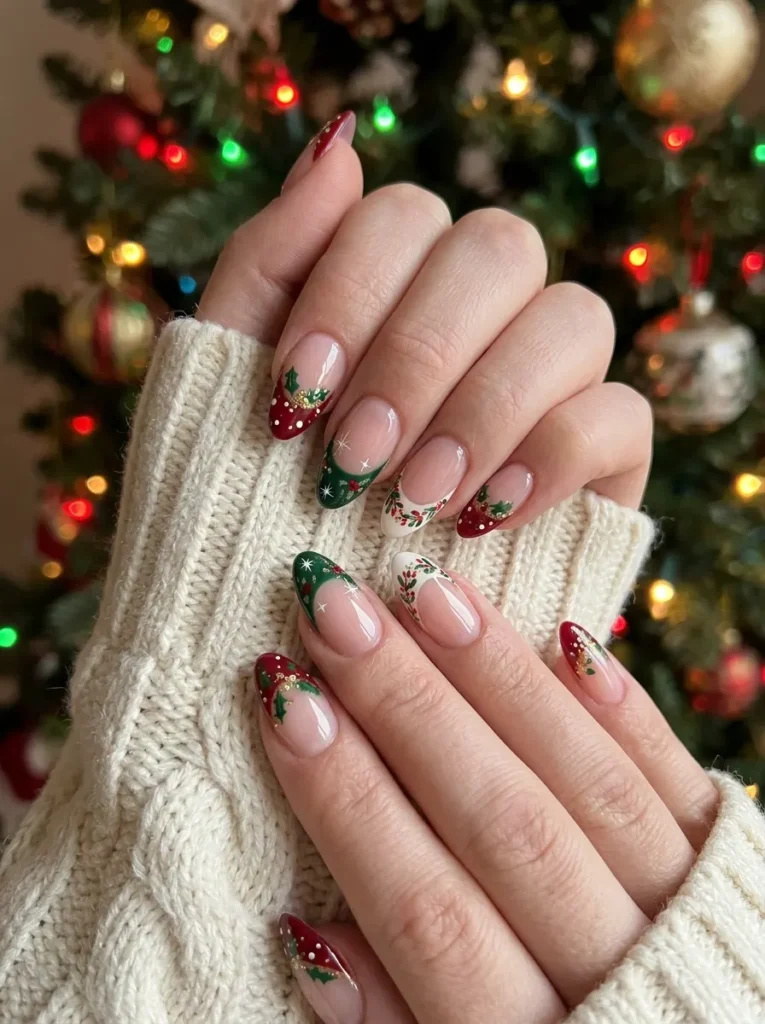
5. Christmas French Tips With Red and Green Details
You like a classic French manicure but want a festive update for December.
The Formula:
- Base color: sheer pink, nude, or milky beige.
- Design: red French tips on some nails and green tips on others.
- Technique: use a French manicure guide or a fine brush.
- Accent: add one tiny gold star or dot near the cuticle.
- Finish: glossy top coat.
Why It Works: French tips leave most of the nail looking clean and natural. Holiday colors provide the seasonal detail.
You can adjust the tip thickness to suit your nail length. Thin lines look delicate, while wider tips create a bolder effect.
Pro Tip: Match the curve of each tip to your natural smile line. This small detail helps the manicure look balanced.
Best For: Short square nails, natural oval nails, and almond-shaped nails. Beginners can use French tip guides for more consistent lines.
Make It Last: Cap the free edge with top coat. If you use guides, remove them carefully before the polish fully hardens.
⚠️ Common Mistake: Adding too many colors and decorations can make a manicure look crowded. Choose two main colors and one accent shade. If you love glitter, use it on one or two nails instead of covering every detail.
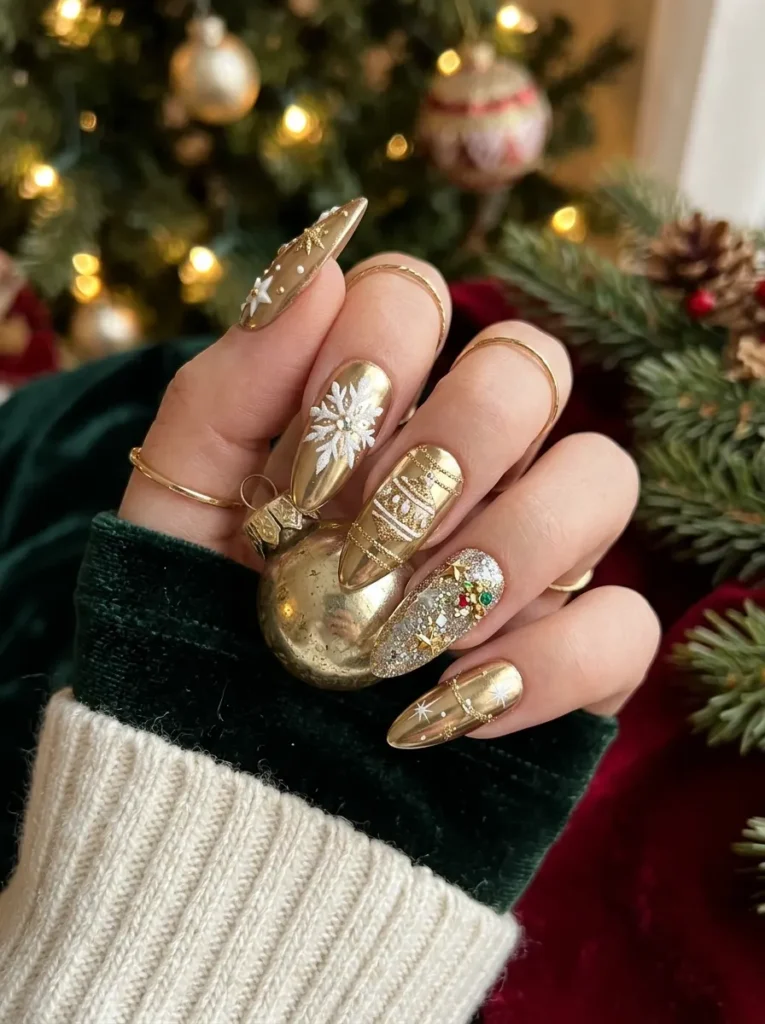
6. Gold Chrome Christmas Nails for a Glamorous Holiday Look
You want a little sparkle that catches the light at every Christmas party.
The Formula:
- Base color: black, deep burgundy, or warm nude.
- Design: gold chrome accents or metallic gold feature nails.
- Technique: apply a compatible chrome powder over the appropriate cured gel layer.
- Accent: add a tiny gold star or minimalist metallic line.
- Finish: use the top coat recommended for your chosen chrome system.
Why It Works: Metallic finishes reflect light and create a polished, festive effect. Gold pairs especially well with deep holiday colors.
You can use full chrome on one nail or keep the metallic finish to a few small accents. Both approaches work beautifully.
Pro Tip: Chrome products often need a specific gel base and application method. Follow the manufacturer’s directions rather than applying powder over any random polish.
Best For: Short square nails, medium almond nails, and long coffin shapes. This look suits evening parties, Christmas dinners, and New Year’s events.
Make It Last: Use compatible products and seal the edges as directed. Avoid picking at lifting gel or chrome layers.
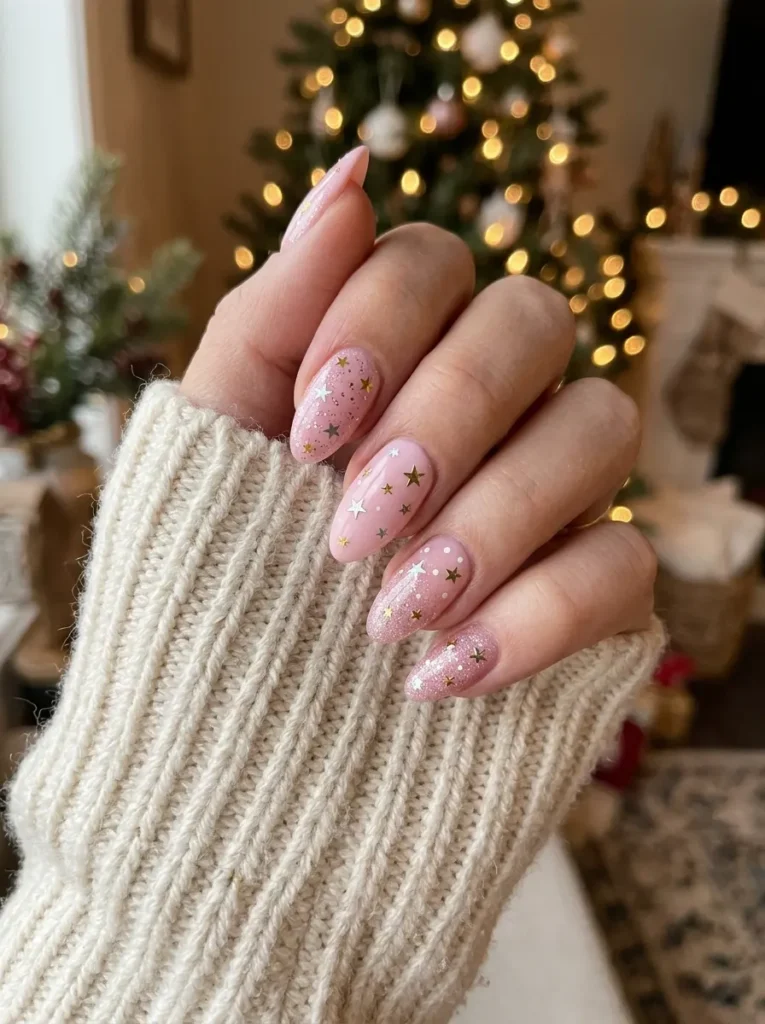
7. Pink Christmas Nails With Tiny Festive Stars
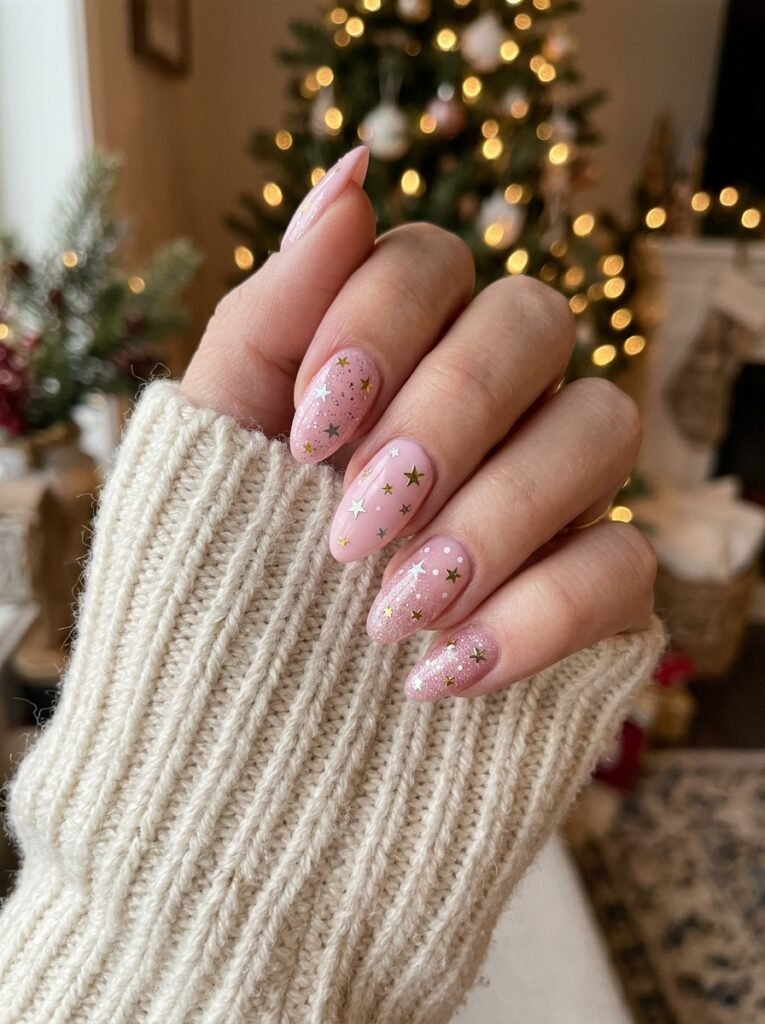
You prefer soft, feminine colors but still want your manicure to feel unmistakably Christmas-ready.
The Formula:
- Base color: blush pink, milky rose, or sheer pink.
- Design: tiny white stars, gold dots, or delicate silver sparkles.
- Technique: use a dotting tool and fine liner brush.
- Accent: add one small star to each ring finger.
- Finish: glossy or pearly top coat.
Why It Works: Pink creates a gentle base for delicate holiday details. Gold and silver accents add festive shine without overpowering the softer palette.
This design also grows out more subtly than a manicure with a strong color contrast at the cuticle.
Pro Tip: Use a sheer pink base if you want a natural-looking result. Add just enough shimmer to catch the light without hiding the base color.
Best For: Short natural nails, rounded shapes, and medium almond nails. Beginners can create the dots with a toothpick or nail art dotting tool.
Make It Last: Apply thin layers and allow enough drying time between coats. Keep cuticles comfortable with cuticle oil once your polish has fully dried.
Your holiday manicure should feel like you, with a little extra sparkle for the season.
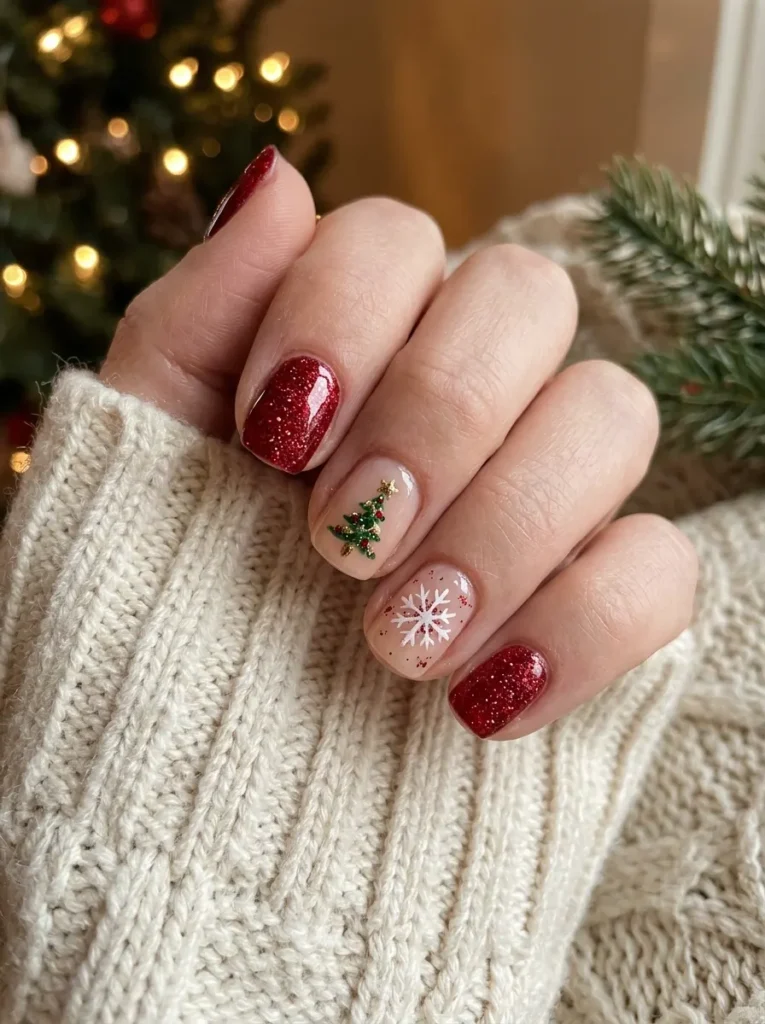
8. Short Christmas Nails With Red Glitter
You want festive nails that feel special without growing your natural nails or booking a complicated design.
The Formula:
- Base color: classic red, cranberry, or sheer nude.
- Design: fine red glitter across the full nail or concentrated near the tips.
- Technique: apply glitter polish in thin, even layers.
- Accent: leave one nail glossy red without glitter for contrast.
- Finish: use a compatible glossy top coat.
Why It Works: Glitter adds holiday sparkle without requiring detailed nail art. Short nails can look especially striking when you pair a rich red with a fine, reflective finish.
You can also use glitter as a gradient. Concentrate it near the tips and blend it toward the center for a softer effect.
Pro Tip: Choose fine glitter if you want a smoother finish. Chunky glitter creates more texture and may need extra care around the edges.
Best For: Short natural nails, rounded nails, and short square nails. This design works for everyday December wear and Christmas parties.
Make It Last: Apply thin coats and seal the free edge. When removing glitter polish, press a remover-soaked cotton pad against the nail before gently wiping.
9. Christmas Cat-Eye Nails With Emerald Shimmer
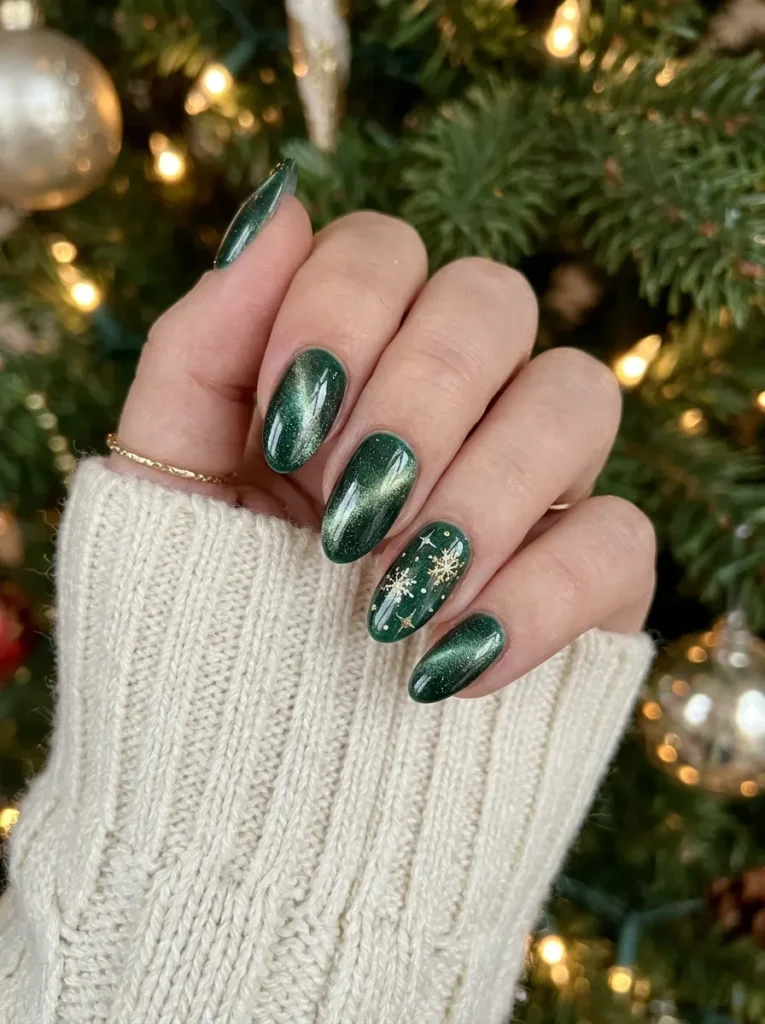
You want a modern Christmas manicure with depth, shine, and something a little different.
The Formula:
- Base color: deep emerald green or burgundy.
- Design: magnetic cat-eye shimmer with a soft diagonal light band.
- Technique: use magnetic gel polish and the compatible magnet.
- Accent: keep the remaining nails in the same color family.
- Finish: follow the gel system’s curing and top-coat instructions.
Why It Works: Magnetic pigments create a shifting band of light across the nail. This gives the manicure depth without adding extra decorations.
Emerald green feels festive, while burgundy offers a warmer alternative. Both shades pair beautifully with winter-inspired beauty looks.
Pro Tip: Hold the magnet at the angle recommended for your product. Small changes in distance and direction can change the shimmer pattern.
Best For: Short oval nails, medium almond nails, and longer tapered shapes. Beginners can ask a nail technician to create the magnetic effect.
Make It Last: Follow the product’s curing instructions carefully. Never peel off gel polish, and stop using any product that causes irritation.
🧴 Shortcut: Already own red polish, white polish, and a clear top coat? Start with red nails and add a few white dots or simple snowflakes. You can create a festive manicure without buying a whole new collection.
10. Christmas Ornament Nails With Tiny Gold Details
You love decorative Christmas nail art and want a design inspired by sparkling holiday ornaments.
The Formula:
- Base color: deep red, forest green, or milky white.
- Design: small round ornaments in red, green, and gold.
- Technique: use a dotting tool to create the ornaments.
- Details: add a thin gold line or tiny loop above each circle.
- Finish: glossy top coat.
Why It Works: Round ornaments create a recognizable Christmas theme. The tiny gold details suggest hanging decorations without requiring intricate painting.
A neutral base keeps the artwork clear. A darker base makes metallic accents stand out.
Pro Tip: Use a dotting tool with two different sizes. Larger circles become statement ornaments, while smaller dots fill gaps without crowding the nail.
Best For: Short square nails, oval nails, and medium almond shapes. Beginners can place one ornament on each accent nail.
Make It Last: Allow the artwork to dry fully before adding top coat. Use a gentle brush stroke to avoid smudging the tiny details.
Frequently Asked Questions
1. What are the most popular Christmas nail art designs?
Classic red nails, green manicures, candy cane stripes, snowflakes, and Christmas French tips all make festive choices. Gold chrome and magnetic cat-eye finishes offer more modern options. Choose one design that suits your nail length and personal taste, then add small holiday details for a balanced look.
2. What colors look best for Christmas nails?
Red, green, white, gold, and silver create a traditional Christmas palette. Burgundy and emerald offer deeper, richer alternatives. Blush pink, milky white, and champagne work well for a softer finish. Choose two main colors and one accent shade to keep your manicure coordinated.
3. Can you create Christmas nail art on short natural nails?
Absolutely. Short nails work well with tiny stars, simple dots, thin French tips, small snowflakes, and glitter polish. You don’t need long acrylic extensions for festive nail art. Keep your designs small, leave some negative space, and use a fine brush or dotting tool for clean details.
4. How can you make Christmas nail art last longer?
Start with clean, dry nails and use a compatible base coat. Apply thin layers of polish, allow sufficient drying time, and finish with a suitable top coat. Avoid picking at polish and wear gloves when cleaning. Use cuticle oil regularly to keep the surrounding skin comfortable.
5. Can beginners do Christmas nail art at home?
Yes! Start with simple designs like red glitter, alternating red and green nails, or tiny white dots. A dotting tool, fine liner brush, and nail polish remover can help you correct small mistakes. Try detailed snowflakes or magnetic effects later, once you feel comfortable with basic techniques.
Conclusion: Find Your Favorite Christmas Nail Art
The best Christmas nail art is the design that makes you smile when you look down at your hands. You might love classic red polish, tiny snowflakes, playful candy canes, or reflective emerald chrome.
Start with a color you already love. Then choose one festive detail that suits your nail length, budget, and plans. You can create beautiful Christmas nails on short natural nails, too.
Save this guide to your Christmas nail inspiration board so you have fresh ideas ready for your next manicure. Which design would you choose first: classic red, snowy white, or sparkling green?